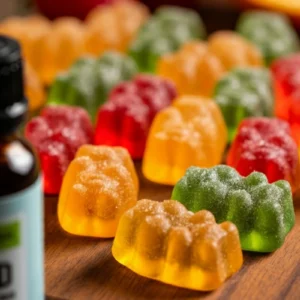
Homemade CBD Gummies
Relax, unwind, and savor every chewy bite with these customizable homemade CBD gummy bears. Sweet, fruity, and stress-busting treats made right in your kitchen!
Equipment
- Silicone gummy bear mold (or any fun shape you like!)
- Medium saucepan
- Whisk
- Dropper or squeeze bottle (for accurate gummy filling)
- Medium mixing bowl
- Measuring cups and spoons
Ingredients
- ½ cup water divided
- 1 packet unflavored gelatin or 2 ½ teaspoon
- ¼ cup honey or agave syrup adjust to sweetness preference
- ½ cup fruit juice any flavor (just make sure it’s 100% juice for bold flavor)
- ½ teaspoon natural food coloring optional, for extra pop of color
- Desired amount of CBD oil or isolate adjust dosage based on your needs; see notes for guidance
Instructions
- Prep the molds: Grab your silicone gummy mold and place it on a flat surface, like a baking sheet, for easy transport. It’s about to get a little sticky in here.
- Bloom the gelatin: Pour ¼ cup of cold water into a medium mixing bowl. Slowly sprinkle the gelatin over the water, whisking to avoid lumps. Set it aside for 2–3 minutes, or until your mix looks like a thick gel.
- Heat it up: While your gelatin blooms, heat your fruit juice, remaining ¼ cup of water, and honey or agave syrup in a medium saucepan over low heat. Whisk constantly until the mixture is warm and the sweetener dissolves (but don’t boil it, friend—that’s not the move).
- Combine and whisk: Add the gelatin mixture to your warm juice blend and whisk until it’s smooth as silk. Remove the pan from the heat. If you’re feeling fancy, this is where you add a few drops of natural food coloring for that extra wow factor.
- Infuse the CBD: If you’re using CBD oil, gently whisk it into the warm mixture. For maximum accuracy, double-check the dosage based on your bottle’s label and your needs (we’re aiming for relaxation, not wild miscalculations). If you’re using isolate, dissolve it thoroughly.
- Fill your molds with precision: Use your dropper or squeeze bottle to carefully fill each gummy mold. Take your time—there’s no rush to greatness.
- Chill time: Pop the molds into the fridge and let them set for at least 1 hour (or up to 2 if you’re impatient like me and keep peeking).
- Pop and enjoy: Gently remove the gummies from their molds. Store them in an airtight container in the fridge for up to two weeks, but honestly, I doubt they’ll last that long once word gets out.
Notes
- Dosage Matters: Start small, especially if you’re new to CBD. First, figure out how many milligrams (mg) of CBD you want per gummy. Then match the total mg of CBD in your oil or isolate with the number of gummies you’re making. For example, if 500mg is in one bottle and you fill 20 gummy molds, each gummy will have 25mg CBD. (Math, but make it tasty.)
- The Disclaimer You Need: Listen, friend—I’m not your doctor, pharmacist, or life coach. This recipe is for informational purposes only. Always consult a healthcare professional before introducing CBD into your routine, especially if you’re pregnant, nursing, or taking meds. And please keep these out of reach of kids and pets—because what relaxes adults does not work the same for your toddler or fur baby.
- Custom Vibes: Want less sugar? Swap honey with a sugar-free sweetener. Prefer bubbles? Try using sparkling juice for extra pizzazz (but stir gently!).
- Pro Tip: If you want to store these longer, coat them lightly in cornstarch before sealing in the container. It’ll keep them from sticking together and give them a store-bought feel.